First off, I am going to let you know that I will be unapologetically bragging on my husband throughout this post.
I will say - David is stubborn. I'm impatient. So I'm more prone to "let's buy it" vs. "let's build it from scratch." When he told me he wanted to build the mantle from scratch, I was pretty sure he was crazy, but we went with it.
Back in
this post, I explained how we hired a mason to remove the false front of the existing fireplace and patch the brick. And how we went to a salvage yard to try to find a mantle to go there, but couldn't find any that would fit just right. So, David set out to build the mantle himself.
First, we had to get the fireplace prepped. The fireplace looked like this after the mason was done.
We hired a mason to expose the original fireplace
David next had to frame in the fireplace surround. He cut all his boards to length, then pieced them together in the living room lying down on the floor. We raised it up and voila...we had a frame to attach to the existing fireplace.
Cutting the bottom brace off the frame. Love those socks!
The frame in place
Let's take a moment to admire the beauty of that shiplap that I worked so hard on. Just kidding. The frame! David put two 2x6 boards in the middle of the upper part of the frame so that when we hang our TV above the fireplace, the TV mounting bracket can be attached directly to those boards.
Next, sheetrock. Ugh. Heavy, messy stuff. I may have nightmares tonight just thinking about the mess it made. BUT - it went up a lot easier than we thought.
Sheet rock attached to the frame and with a first coat of mud, getting ready to be primed and painted
David then painted the sheetrock (and the ceiling, and the rest of the room). And then, the fun part - he started on the mantle.
Now, our inspiration. You can't see much of it, and it was filthy, but you get the idea! The grooves, the different dimensions/layers, the corbels, etc.
We found this mantle at Hailey's Salvage in Nashville and used this picture and some scaled drawings David made of it to build the mantle for our house
David started with a sheet of MDF, and ripped it down with a table saw to the size boards he needed. Then, he cut the grooves into it using different router bits. That's the part that absolutely amazes me. He cut all those little grooves into the wood like he'd done it 100 times before. But he hadn't. And it's perfect.
Check out all those grooves masterfully routed into the MDF ;)
So then, the really difficult part. We needed corbels. We should've traced one at the salvage yard, but didn't. So David found a cad program to use online, drew it out on that program, and then sent it to
the genius me. I cut it out of card stock on my Silhouette Portrait (it's a vinyl/fabric/card stock cutting machine that's amazing and so much fun!).
Pattern for the corbel that David drew online and I cut with my Portrait
Back to the real work. He cut out the corbels with a jigsaw, sanded them down with a belt sander to smooth out the edges, and then it was all ready to be painted.
We've quickly realized how important the painting process is to making things look professionally finished. David used bin tinted shellac primer to seal the MDF, then used Sherwin Williams oil-based pro classic semi-gloss with Flood penetrol, which is a dry-time extender and leveling agent. (I just spoke Greek. Questions? Ask David.) The finish is so pretty, smooth, and shiny!
After finishing up the paint job, he brought it into the house and attached it to the sheetrock. We were hoping to just use construction adhesive, but there wasn't enough surface area to make it stick. So we screwed it in, and will be covering up the screws with baseboards along the bottom (which we had already planned on adding) and trim under the top.
The semi-finished mantle!
I couldn't be more excited about the way it looks. It's absolutely beautiful. I'm proud of him and how close to the old mantle we found at the salvage yard this one looks (except in MUCH better shape and the perfect size for our opening).
We still need to finish trimming it out (you can see the exposed frame here, which will be covered), but we want to run the wiring for the TV first (HDMI cables and such).
Next up - the hearth. The brick on the hearth had been removed prior to us buying the house, but we didn't like the concrete slab showing, so decided to cover it with tile. We chose
this mosaic tile from Lowes and light gray grout.
David cut the tiles to size using a corded Dremel and a diamond blade, which we were afraid would be terrible but ended up not being too bad (says the wife who busied herself in another part of the house while that work was going on and who did none of the cutting work). We laid the tile out ahead of time to get all the pieces cut, then applied the mastic, and slowly but surely laid the tile sheets.
Laying the mosaic tile on the hearth
I have to say this was a process we were pretty nervous about as it was our first tiling job (well David's first...Dad let me tile and grout a step in their garage when I was in middle school). But it went pretty smoothly!
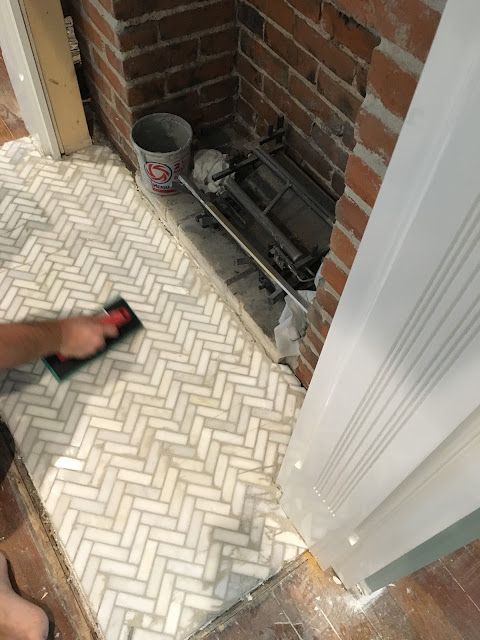
Applying the grout
The grout looks pretty dark here but dried much lighter. And look at that beautifully routed mantle!
The (not quite) finished product
We love how the tile looks on the hearth!
Next on the hearth, we need to caulk/grout by the firebox and add trim around the outside edges (likely stained to match the floor).
I'm so proud of how this project turned out! It's amazing what David has pushed himself to learn and do since we bought our olive on Olive. This home is so full of character, but it's fun getting to add even more with the transoms, the custom mantle and hearth, exposing the shiplap, and other things we have done or plan to do. I can't wait for the living room to be finished so we can put our feet up and enjoy that space!
And for good measure...here's a photo of what the fireplace looked like before we moved in:


