Showing posts with label island. Show all posts

Monday, October 17, 2016

A Lesson in Never Painting Brick

We've talked about this project previously, but I have to say that one of the most time-consuming things we've done in our olive on Olive is to remove the paint from the brick stack in the kitchen. But now that it's complete, I couldn't be happier! And a note if you're thinking about painting brick: don't!! The look of exposed brick (if it's a good color and in good shape) is full of so much more character than painted brick. And if you ever change your mind about wanting it exposed/original vs. painted, it's a nightmare to get that paint off!

We started this project in late January. I researched online and found that Citristrip was a recommended choice for paint stripper. It doesn't stink as bad and is effective at removing paint.

Stripping paint is slow and not fun. But we do like Citristrip for those times when you have no choice but to strip paint.

So I taped off around the brick, grabbed an old paint brush to apply the stripper to the brick, and went at it. I wore heavy gloves and used a scraper (for lack of a better term) and a stiff-bristled brush to remove the paint. And it took FOREVER.

I spread plastic out on the floor to protect the brick, and poured the stripper on a large piece of aluminum foil to "slop" it up with my paint brush.

After an hour or two of scrubbing at this section of wall, I had managed to do this:

I quickly realized this wasn't going to be easy. So I worked for several hours over the next few days, scraping away at that brick. I found you basically had to remove the top layer of the brick to really get the paint off. The stiff bristled brush would leave marks in the brick (which were kind of soft) so I used it sparingly. When I did have to use it, afterward I would go over that brick with a stripping pad to smooth it back out.

Several days later, I'd managed to get us to this point:


Which is how it stayed for quite some time. We transferred our Baby Nolan embryo in early February, so I immediately stopped using the stripper and didn't need to be around the fumes.

Enter my mom and dad. I have to poke a little fun at them here because they said they'd come up and work on the brick to help us out. Dad kept saying it wouldn't take long at all. Then they came and tried to work on it and realized how painstakingly terrible it is to remove paint from all porous brick. They talked to a local paint shop that recommended a different stripper, tried it, and it was no better.

So life happens, and the brick stayed partially uncovered like this for several months.

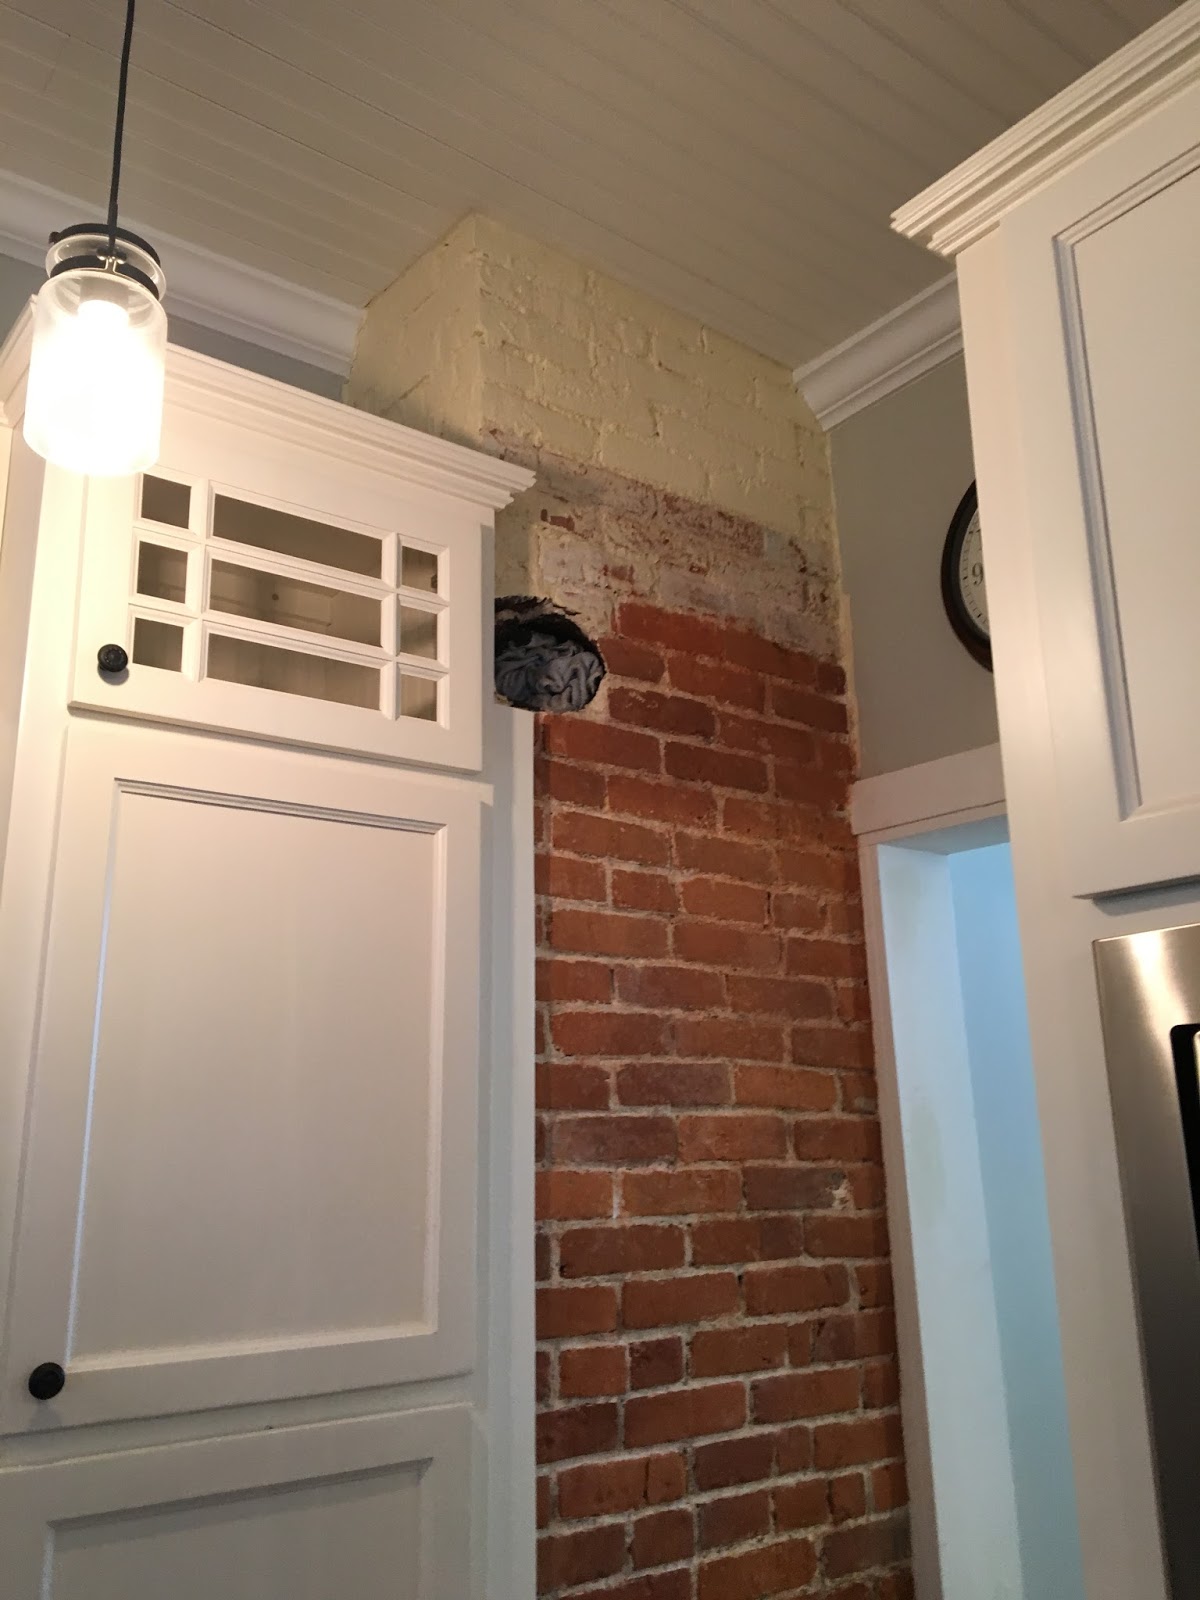
Fast forward to a couple months ago. I'm very pregnant, and Dad is getting ready to have knee surgery. He and Mom decided they were going to get that brick uncovered before he'd been down and out for several weeks after having his knee replaced. With a renewed sense of energy :) they tackled the project again. This time, they brought out the heavy machinery. I believe a Dremel, a rotary tool, and a sander were all used to tackle the brick. The work went much faster this time. They figured out not to let the stripper stay on the brick for as long and that helped as well. In a matter of a few days, the brick were uncovered!
I was so excited to come home and see this progress!

The beautiful exposed, not painted brick!

This project had been a thorn in my side because I wasn't able to get it done before we got pregnant. I hate leaving things unfinished, and I hate feeling helpless, but it obviously wasn't worth risking Nolan's health for me to strip paint off of brick. We really appreciate all of Mom and Dad's work on getting the brick uncovered! It's so nice to walk in the house and see that punch of color and character that before had just blended in with the walls and cabinets. 

There is a hole in the brick stack where a pipe was previously installed. We do plan on getting a brick mason to fill that hole when we have one come to help with the upstairs portion of this stack and some work we want to do in the dining room. Until then, we've covered it up with a flue cover, and are enjoying our beautiful finished kitchen!

The finished product - we love our exposed brick!

Sunday, February 28, 2016

Brightening Up the Kitchen

The kitchen isn't quite finished yet, but I haven't posted a blog update in a month, and we've made too much progress not to share. So, here goes!

First - a secret I need to share. We are pretty good at getting things done around the house. David can build, we can paint, and I'm A+ at buying things, especially shopping online. But when it comes to picking out things and deciding color schemes, accessories, furniture, etc. - we both freeze. And then I run to my laptop to email Bri Moysa at Emerson Grey Designs. Bri is amazing. We first met her when commenting on a pin on Pinterest of a nursery she had designed. One of my best friends reached out to Bri and got her to design her daughter's nursery, then we reached out to her and she put together a design for Sagan's nursery. It was amazing. The guidance, attention to detail - and she just gets us and what style we're going for. We later had Bri's assistance to redesign our living room and kitchen in our old house, which we equally fell in love with. Her talent is amazing! Out of respect for Bri, I won't post source links to all the details, but will try to include them for main pieces.

So, as soon as we planned to buy the Olive on Olive, I reached out to Bri and let her know her assistance would definitely be needed. All that to say - while we're doing the physical labor here, it's under the guidance of the very talented Bri Moysa. :)

To the kitchen...first, I think you need to see some before pics. Excuse the mess - I'm pretty sure this was the week we moved in, so boxes. for. days.

     
Before: Kitchen Entryway

Before: Light Fixtures

Before: Green Island, Unexposed Brick

Before: Microwave Shelf

First, the island. I didn't mind the green color it was before, but we felt it needed an update. We worked with Sherwin Williams to figure out how to paint over the catalyzed varnish that was on there. We lucked out and found that we needed only to lightly sand the varnish then use oil-based paint with penetrol added to help it self-level for a smooth finish. We chose SW's gauntlet grey. It's perfect - not too dark, not too light. David painted it and I'm so proud of how it turned out!


The island is painted SW's Gauntlet Gray.
Sources: Stools | Print | Sugar Pot

Next, the walls. The walls were a light shade of yellow before. We went with Benjamin Moore's Sweet Spring. It has a hint of green, hint of gray. It's perfect for brightening up a room. It's insane what a transformation a coat (well a couple of coats) of paint will do. ESPECIALLY if you also paint the trim. We are huge fans of Sherwin Williams Pro Classic Semi-Gloss in Bright White. We love the bright white and the sheen it provides. It gives the entire room a facelift.

Another thing that immediately changes a space is replacing light fixtures. We swapped out the brass ones that were there for these, and love the huge difference it made!


You'll notice a special project we have going on over in the corner. We are exposing the painted brick, and it looks amazing so far! It's taken probably 14 hours to uncover as much as you see there. Slowly but surely, we will remove the paint off every one of those bricks and it will be glorious. I'll have an entire post about exposing the brick, the process we're using, and more.

In the entryway, we wanted it to be functional but still pretty. Bri chose a bench, coat rack, and cabinet for us that we love. I think the olive tree, quote, and tray perfectly round out that space, along with the feather prints and pillows. As for the quote - "today is a great day for a great day" - that was a fun DIY project I'll share details about soon!

Sources: Bench | Pendant


Still to come is a command center (David's finishing up the brackets he's making to hang the shelves) next to the door. We also plan on replacing that door at some point this spring. The one other piece we're missing is cabinet doors above the fridge. The previous owners kept a TV up there, but we'd rather have cabinet doors so it's more functional for us and provides additional storage. One of the biggest transformations on that side of the room is the addition of a new microwave and trim kit. Above the oven was an open space with a microwave sitting in it when we first moved in. We love the finished look of the microwave + trim kit.


We're really proud of how the kitchen is coming along. We still need to finish accessorizing and a few of the projects I mentioned above, but we absolutely love how it's coming together.